Suggested Results

    Home Inspiration Recipes Family Friendly Healthy Lunch Ideas

    Healthy Lunch Ideas

    Family Friendly Healthy Lunch Ideas

    BLT Hasselback Potatoes

    Ideally, a good family lunch should be easy, healthy, and introduce a bit of uplifting colour and energy to the midday break. After all, it’s no secret that a hearty and interesting lunch dish can really help us power through the typical mid-afternoon slump.

    Even so, for the majority of the week, most of us rely on family lunches being fairly quick and simple affairs. This applies equally whether everyone’s sitting down to eat together, or each taking their own individual portion to work or school in a lunchbox.

    With that in mind, below you’ll find a couple of quick, easy and healthy lunch ideas for all the family to enjoy - regardless of whether or not you’re all eating at the same time and place!

    BLT Hasselback Potatoes

    BLT Hasselback Potatoes

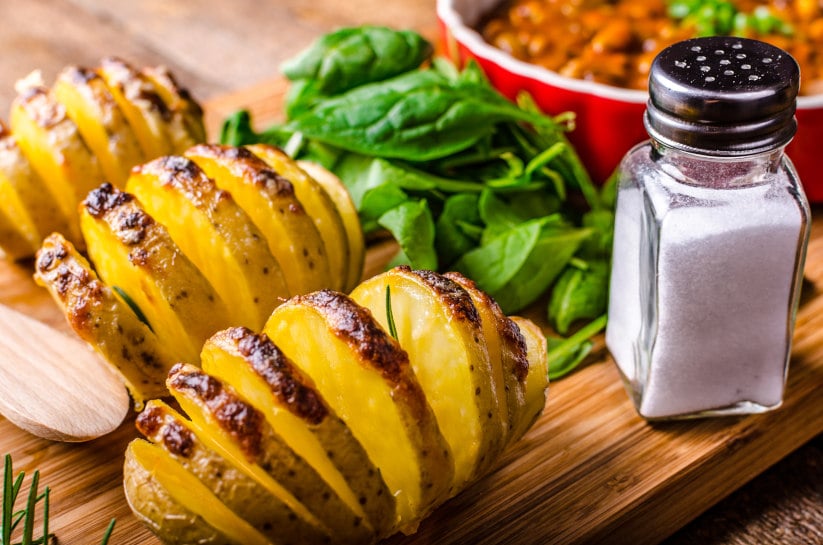
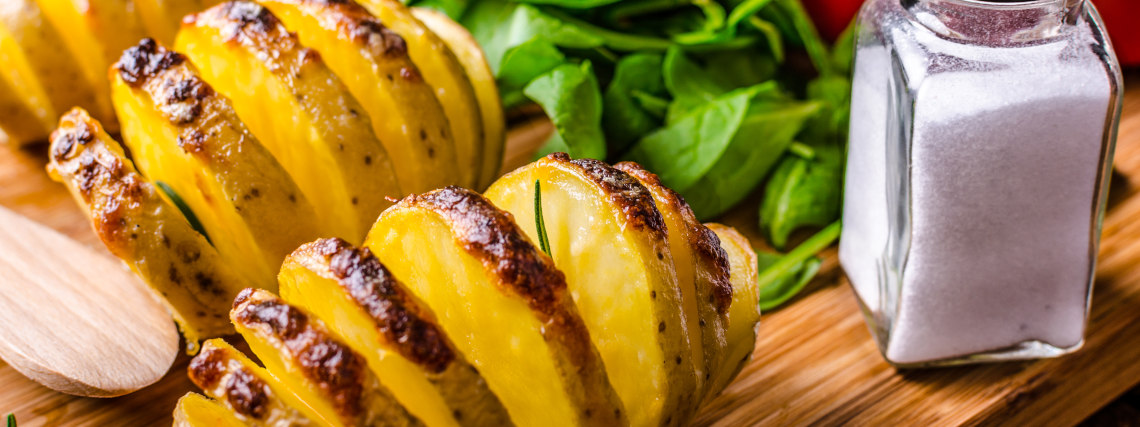
    A so-called ‘hasselback’ is a popular Swedish way of preparing potatoes, and a fun and delicious way of sprucing up the old familiar spud. You make them by slicing any good roasting potato into multiple thin layers downwards from the top, but leaving it intact at the base.

    The results look a little bit like a toast rack, which is exactly how this recipe treats them. As well as providing some delicious contrasts in texture and flavour, serving potatoes this way also means you can stuff the ridges and slots with all manner of other ingredients.

    You can make the potatoes in advance, and store them for up to 3-4 days in a sealed container in the fridge. When you’re ready to bring them to the table (or throw them in a lunchbox), it’s simply a case of popping in your toppings, and you’re good to go. The result is an easy and healthy lunch idea for the whole family.

    If you’re at home, feel free to reheat the potatoes before sliding your toppings in, but they also make for a very portable on-the-go lunch option when wrapped in foil or greaseproof paper and eaten cold.

    View

    You’ll need:

    • A few fist-sized roasting potatoes (as many as you need!)
      Try Maris Piper or russet varieties for ideal results, but you can easily make this recipe with sweet potato for a nice change.
    • Fillings of your choice
      We like the BLT option (bacon, lettuce, avocado, tomato) - but feel free to add any combination of cheeses, leaves and proteins that you enjoy. As long as you can slice it thinly, it’ll work!
    • A little olive oil, to coat the potatoes for roasting
    • Salt and pepper to taste

    Method

    1. Preheat the oven to 210C (450F, Gas Mark 7). If using a fan assisted oven, drop the temperature by around 10 degrees, or to Gas Mark 6.
    2. Wash and dry the potatoes, then carefully cut a series of thin slices into them downwards from the top, stopping around 0.5cm from the cutting surface each time.
    3. Space your downward slices close together, leaving just a few millimetres between each one, and fit in as many as you can across the top of each potato. You’ll end up with a sort of fin or grille effect when finished, but the spud itself should remain in one piece when picked up.
    4. Rub or brush them lightly with a small amount of olive oil and sprinkle with salt and pepper if you like. Arrange on a baking tray with a little space between each.
    5. Roast for anywhere from 25-40 minutes - the exact cooking time required will depend on the size of the potatoes, the thickness of the slices you’ve made, and the level of crispness you want.
    6. Check them after 20-25 min, and make a call about how much longer they’ll need. (30-35 min is probably about average, but you’ll need to keep half an eye on them to judge it more precisely.) Make sure the base of each potato is cooked through below where the slices stop.
    7. When golden and lightly crunchy around the ‘fins’, remove from the oven and leave to cool on a wire rack.
    8. If you’re eating them right away, you can stuff your choice of fillings between the layered slices while still warm. If you’re saving them for lunchboxes, let them cool fully and then pop them in a sealed container, lined with a sheet of kitchen roll.
    9. For lunches on the go, you can either stuff the cold hasselbacks with your choice of fillings before packing them up, or leave the fillings on the side so that the spuds can be reheated in a microwave before stuffing.
    Jarred Salads

    Jarred Salads

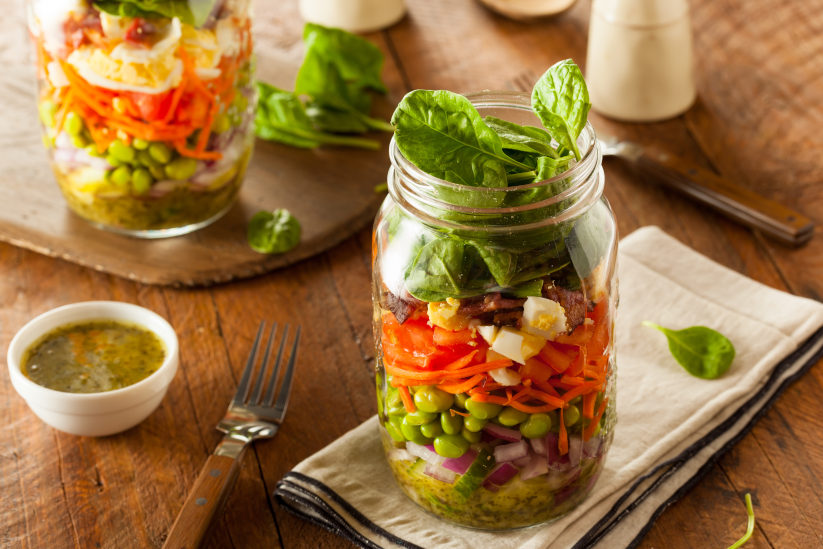
    This is a great way to make hearty salads more interesting and fun, rather than simply piling a few handfuls of leaves into a bowl or lunchbox and calling it a day. By layering up various cooked and raw ingredients in a sealed jar, you’ll give this quick, easy and healthy family lunch idea a neat visual twist that somehow makes a weekday lunch salad so much more appealing.

    You can include more or less any combination of proteins, grains, vegetables and leaves that you like. The key here is to keep the layered ingredients in each jar separate and well-defined, and to place them in the optimal order for preserving texture and flavour until it’s time to eat.

    At that point, it’s fun to stir or shake everything together for a more mixed-up mouthful. Kids will especially enjoy this part - just make sure the lids of the jars are properly fitted first!

    View

    Ingredients

    You’ll need as many lidded mason jars (or any good-sized washed-out preserve jars) as there are people to serve. Other than that, you can use whichever ingredients you want. We especially enjoy such ingredients as:

    • Cooked and cooled pasta, bulgur wheat, quinoa, or other grains (rice is fine if you can cool it quickly after cooking and get it straight in the fridge, but it isn’t ideal for lunchboxes if it’ll be sitting at room temperature for hours before eating)
    • Raw spinach leaves
    • Halved cherry tomatoes
    • Tinned sweetcorn
    • Cubed feta cheese
    • Mixed olives
    • Sliced hard-boiled eggs
    • Cooked diced chicken breast, or rolled slices of ham
    • Nuts and seeds
    • Dressings of your choice - soy and ginger or lime and honey are both great, depending on what else you’re including in the salad

    Method

    As we said, the secret is to add the layers to the jar in the right order, and keep them as separate as possible until it’s time to shake it all up and dive in. Any liquid ingredients should always go in at the bottom, to help keep the layers above drier. Follow this basic layering pattern, from first in the jar to last:

    • Dressings
    • Chunky cooked proteins, pasta, and/or grains - anything that might be enhanced by absorbing some of the liquid (not leaves, softer vegetables, or other ingredients that might become overly soggy or wilted)
    • Dry ingredients and textured additions (things like cheeses, nuts, croutons, crispy onions, etc - any bits and pieces you’d largely want to keep fairly dry and separated from the dressing, in other words)
    • Chopped veg and firmer salad pieces (tomatoes, cucumber, corn, olives etc)
    • Delicate leaves and greens

    When you’re ready to eat, you can either shake it up and eat it straight from the jar, or you can always upend it and flip it out into a bowl or lunchbox. If you added everything in the right order, tipping it out this way will mean the leaves will then be on the bottom, with the dressing on top - which is presumably how you’d have served it up fresh anyway.

    Feeling inspired? Try our range cooker tool and discover your perfect range cooker today.